The second Spring starts sending Winter back to the cold dark cave from whence it came, like clockwork my mind turns to my home. I find myself down interiors rabbit holes on Pinterest, a simple bedroom tidy ends up in full blown clear out and reorganisation of the drawers under my bed (meanwhile the rest of the room stays messy!), and I inevitably start planning DIY projects to give my home the gentle breath of new life it so craves.
One of my favourite things to make in Springtime is a new set of linen napkins. I still remember the first set I made, and marvelling at how something so subtle and unassuming could all by itself make me feel so grown up and accomplished as a mother and home maker! There's just something about laying out a set of beautiful, handmade, matching linen napkins, even at the most casual of dinners that feels like you're winning at life.

A set of six napkins can be made from a metre and a half of fabric (doesn't specifically have to be linen of course; cotton works just as well) over a lazy afternoon, and makes for an incredibly thoughtful and well-received gift (seriously, I've been taken aback as to how much people love them and make a point of reiterating to me later on how much they love using them; probably because it's the last thing they'd think to buy for themselves, and again - that winning at life feeling is really real). Plus, it's an excuse to play with all the fun decorative stitches on your sewing machine that otherwise go seriously neglected :)
You will need:
- 1.5m fabric - natural fibres work best; I like linen or cotton
- Contrasting thread - you'll need more than you think as some of the decorative stitches are real thread guzzlers!
- Your sewing machine and usual sewing tools and supplies
Step 1
Start by cutting your fabric into squares measuring approximately 19 1/4". This will result in a napkin that measures about 18" square. Of course, you can cut your napkins to whatever size you prefer - I found this article helpful/amusing when it came to choosing the size of my napkins!
Step 2
Next we need to press the edges and sew the mitred corners. Head to this post we wrote which will take you through sewing the perfect mitred corner easily and painlessly, but instead of folding your edges in by 1/2" and then 3/4" as it suggests in the post, for these napkins we want to fold our edges in first by 1/4" and then 3/8" for a smaller hem border.

Step 3
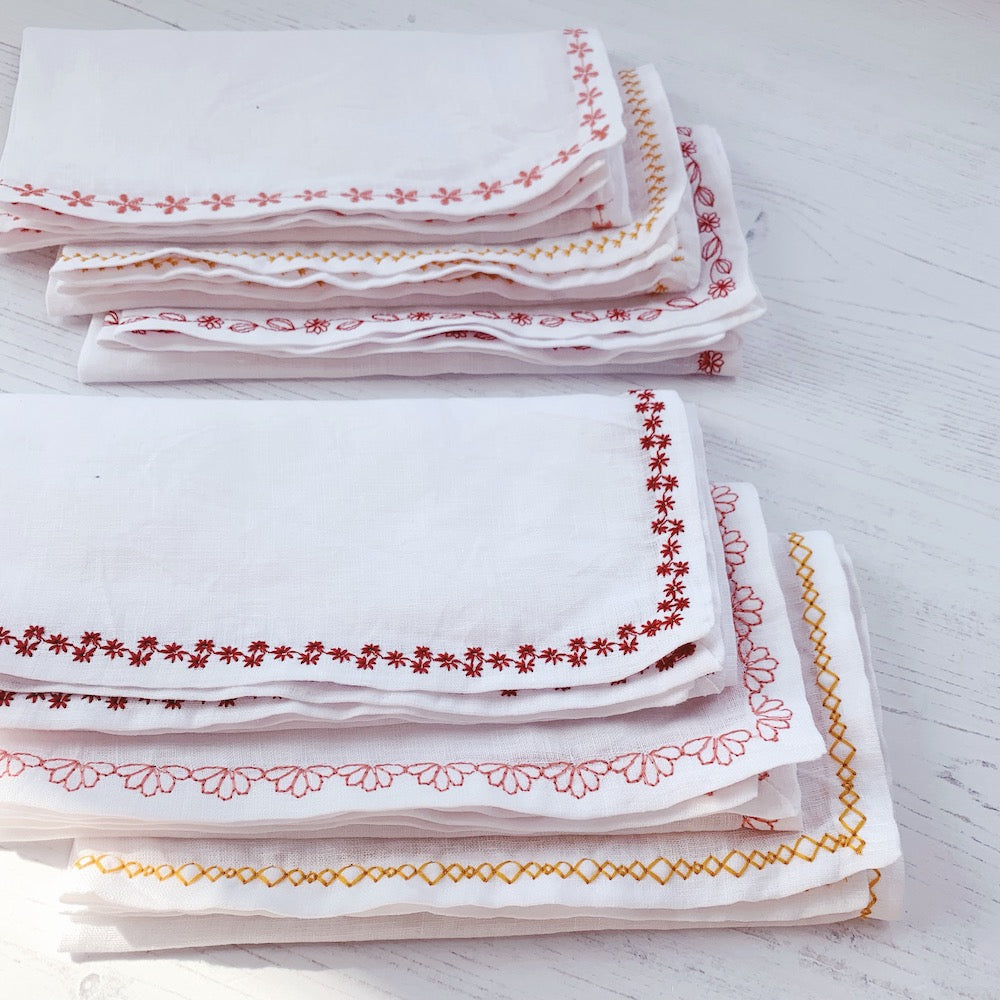
Time to get your decorative stitches on! I have a few tips and words of advice on this before you dive in:
- always test out your chosen decorative stitches on some scrap fabric first so you can assess size, placement and whether or not you like the effect
- stitch from the right side of the napkin
- instead of stitching down one side of the napkin, pivoting and continuing down the next side etc., I've found that I get a better result when I sew each side individually so as not to distort the decorative stitch when pivoting around a corner
- why not try stitching each napkin with a different colour thread, like a rainbow, or your favourite pastel shades?

For this set of pink linen napkins I opted for a more subtle effect with white stitching on the pink linen.

Step 4
The final thing to do - for maximum eleganza - is to fold and press your napkins. This part is sooooo satisfying and really puts the cherry on the cake.
First, fold your napkin in half and press the crease.

Then fold in half again and press to create a vertical crease.

Finally, fold in half vertically again and press to finish.

If you're giving this set of napkins as a gift, a lovely touch is to stack them and tie a ribbon around them to keep them together.

-
Elisalex de Castro Peake

Comments on this post (3)
These are lovely – what a great idea. One thing I’ve always wondered about DIY napkins (and what’s kept me from making them) – do you pre-wash the fabric? It would lose some of its crispness, but otherwise won’t the napkins shrink like mad the first time they’re washed? Or do you wash them and starch them? Thanks!
— Sylwia
Perhaps it’s nice to press all the folds into the napkins when you are assembling them as a gift package, but later on, repeated pressing of the folds will wear out the fabric—especially linen. Best to press flat, drape over a chairback or hangar until the napkin is completely dry, and then just “finger press” the folds.
— Vivian Lewin
How simple, yet elegant. Thanks for the clear tutorial. I love using cotton napkins, but I have never tried your decorative edgings… until now! Thank you.
— Jeannie Zimmerman